

UC Food Blog
Grapefruit wonder

One of my favorite "grapefruit" varieties is one that is similar to my Marsh but sweeter and has an earlier harvest period. It is a "Cocktail" hybrid. However, it really isn’t a grapefruit at all but rather a hybrid of a mandarin and a sweet pummelo. Its juice and fruit are so sweet and delicious. It does have seeds but the flavor is amazing and truly worth planting in the garden for its wonderful juice as well as for fresh eating. It begins to ripen in January and will hang on the tree through March.
Another great variety with an even earlier harvest period is a grapefruit called "Oro Blanco." Oro Blanco is a hybrid between a white grapefruit and a sweet pummelo and was introduced in 1980. This one is also very sweet, but it is seedless and has a much earlier harvest period, from December to March. The only thing that may be a bit off putting is that it has a greenish yellow rind rather than the bright yellow gold of other varieties. Nonetheless, I find this one to be a winner in my book. In fact, in Citrus Variety Collection Notes at UC Riverside, it says:
"10/1988, EMN: My opinion, for what it might be worth, regarding Oroblanco vs Melogold, is this: For maximum returns as a cash crop, plant your acreage to Melogold; but save one space near your back door for a tree of Oroblanco for your own use."
Melogold is another hybrid and a sister variety to Oro Blanco. It was introduced to the industry in 1986 by the Citrus Research Station at UC Riverside. Melogold is fairly similar to Oro Blanco but the fruit is a bit larger and the rind is more yellow at maturity. Both are winners in my book. For more information on this and other citrus varieties for your garden, read the free online publication "Tried and True or Something New: Selected Citrus Varieties for the Home Gardener."
Now, what can you do with grapefruit besides just eat the fruit or squeeze the juice for breakfast? Well, there is always grapefruit and fennel salad, grapefruit sorbet, grapefruit glaze for fish, grapefruit and pomegranate juice martinis, and one of my favorites this time of year is a cranberry-grapefruit conserve that my mom used to make. Here is the recipe:
Mom’s Cranberry-Grapefruit Conserve
Ingredients:
- One large grapefruit (red or white)
- Water
- 2 1/2 cups sugar
- 1 pound fresh or frozen cranberries
Steps:
- Peel strips of the rind from the grapefruit. Include a small amount of white pith.
- In a medium saucepan, blanch the strips by bringing them to a boil over moderate/high heat. Drain and repeat once more.
- Dice the blanched peels into about ¼ inch pieces; reserve.
- Juice the grapefruit.
- Combine the grapefruit juice, cranberries, 1-1/2 cups of the sugar and 1-1/2 cups of water and bring to a boil. Simmer over low heat, stirring occasionally, until the liquid has reduced by half and the cranberries are cooked down, about 1-1/2 hours.
- In a medium saucepan, mix the diced blanched grapefruit peel with 1 cup of sugar and one cup of water. Bring to a boil and then simmer over moderate heat, stirring occasionally, until the peel is translucent, about 40 minutes. Add the peel and syrup to the cranberry mixture and simmer together over moderate heat, stirring occasionally, until reduced to 3 cups, about 25 minutes. Serve at room temperature or chilled. This conserve can be stored for up to a month in the refrigerator.
Note: I like to pour the slightly warmed conserve over cream cheese to spread on crackers or I also serve it with fish or turkey.
Happy Holidays
Is beer sacred? One man thinks of it that way
On a recent Sunday night I went to see Charles Bamforth, the University of California's only professor of brewing, speak at Sudwerk Riverside in Folsom, hosted by the Sacramento Chapter of the UC Davis Alumni Association. The standing-room-only banquet room had an empty seat next to a winemaker and a food scientist; a married couple who came back early from a weekend in Santa Cruz for some edutainment and local brew. Bamforth can pack ‘em in on most of his speaking venues.
Bamforth teaches in the UC Davis food science department. Brewing is fermentation science, which is a food science, and Bamforth’s book on Beer and Health is proof that beer is indeed food. He claims beer is better for health than wine — a point he loves to argue with the wine professors at the Robert Mondavi Institute of Wine and Food Science. That is where his shiny new sustainable brewery was installed by Anheuser Busch.
Bamforth’s favorite movie is, not surprisingly, “How Beer Saved the World.” You can watch it free online in 43 minutes without commercials. As he likes to point out, unlike water, almost no one gets sick from beer. “When is the last time you heard of a beer recall?” he quipped with a grin. If people are worried about illness from eating fruits or vegetables, he suggested they should wash them in beer.
Bamforth likes to share a chuckle over another bit of history. While reading the memoirs of former Chancellor Emil Mrak he learned that Mrak never got permission from the UC Regents to start the UC Davis brewing program in 1958. Maybe after the University of Wisconsin turned down the brewers association when they offered to fund the program there Mrak was wise enough not to ask permission.
As the third UC Davis brewing professor, Bamforth brought British expertise and his own comedic sensibilities. He punctuates brewing science with artful trivia on British, German and Flemish brewing traditions. It is easy to see why his general education classes on beer and brewing are the second largest on campus. (The largest is the formidable favorite, Human Sexuality, but when Playboy magazine published their higher education issue this year it was the brewing class, not sexuality, they featured.) Guest lecturers for his class include the brewing celebrities Fritz Maytag, former owner of San Francisco’s historic Anchor Steam, and Ken Grossman of Sierra Nevada Brewing.
Comedic timing aside, Bamforth also has a serious side. He handles the typical questions with ease, such as, “Why is most American beer so flavorless compared to craft brews?” (He frequently reminds us that the best selling beer is Bud Light.) He compared weather in California to England’s, and reminded us that a light beer is a thirst quencher on hot days and a better pairing for spicy Thai curry and cheesy Mexican cuisines. Bamforth says that neutral beer is more difficult to make consistently — fewer flavors to hide the defects or mask regional differences.
Bamforth’s newest book title, Beer Is Proof God Loves Us: Reaching for the Soul of Beer and Brewing, is a spoof on the Ben Franklin quote, Wine is proof God loves us. If Bamforth had his way, beer would be more revered than wine for its role in human history. He doesn’t care for silliness like beer pong or ridiculous commercials portraying drinking as one-upmanship. He teaches mindfulness and its role in responsible drinking. Drinking beer properly involves a bit of ceremony as meaningful as pouring tea. He instructs us that beer should always be poured into a perfectly clean glass, one that has not had any fingers inside on its trip to the table. There should be a foam head after the perfect pour. Maybe a whispered “Thank you, God” before the first sip would make a nice addition to the ceremony as well.
For more information:
- Courses in food science
- Interviews with Bamforth on Public Radio
- How Beer Saved the World
- UC Davis Brewing and Food Science Laboratory and Winery
- Sudwerk Riverside in Folsom

Pomegranates in the fruit bowl - what now?
Each fall I am delighted by the vibrant color of the pomegranates on display in the produce section of the market. I succumbed to their ancient beauty a few days ago, and purchased two. They added their glistening jewel tones to the fall leaves and dried corn cobs that graced our Thanksgiving table. “Help yourself,” I told our guests. “Please enjoy eating them, that’s what they’re for.” But no one took advantage of the offer, and the lovely pomegranates languished in our post-holiday fruit basket. That got me to wondering what fun things I could do with them before they were neglected too long and ended up in our green barrel as compost.

Mentioned in ancient literature, the name pomegranate is derived from the French words “pomme garnete” or seeded apple. Pomegranates grow on small trees or bushes and were introduced to California agriculture nearly 250 years ago. California acreage planted with pomegranates has doubled in the past five years, with most of the harvested fruit going to make juice concentrates, primarily utilized for their purported antioxidant and other health benefits.
I was surprised by the numerous recipes utilizing the tart-sweet arils from pomegranates, along with handy tips about the best way to part them from the pomegranate’s husk and membranes. Following is a recipe that allowed us a few arils to snack on, and used the rest of the pomegranates in a delicious and delightful new way to enjoy salmon.
Salmon with Pomegranate and Lentil Couscous (from the Pomegranate Council’s website)
Couscous:
1 c. small green Puy lentils
2 c. cold water
2 Tb. Olive oil
1 large onion, minced
1 apple, peeled, cored, and cubed
1 2/3 c. (10 oz.) quick-cooking couscous
2 c. boiling water
1 large pomegranate, seeded
1 Tb. coarsely chopped fresh lemon thyme
Kosher salt and freshly ground black pepper
Salmon:
6, 6-oz. salmon fillets
Olive oil for frying
Kosher salt and freshly ground black pepper
Fresh thyme sprigs, for garnish
Pomegranate arils, for garnish
Lentil & couscous preparation: Pick through lentils and discard any debris, then rinse well with cold water. In large saucepan, combine water and lentils, and bring to a boil over high heat. Reduce heat to medium and boil gently until tender, about 20-30 minutes. Drain, set aside. In medium frying pan heat the oil over medium heat. Add onions and cook, stirring occasionally, until golden brown. Add the apple and cook until it begins to soften. Sprinkle the pomegranate arils and couscous over the onion-apple mixture, then carefully add the boiling water. Remove from the heat, cover, and let stand while you prepare the salmon. Add herbs, salt and pepper to taste.
Salmon preparation: Heat a large non-stick sauté pan over medium heat. Brush salmon fillets with olive oil and season generously with salt and pepper. Place skin side down in the hot pan. Cook, without disturbing, until the skin is golden brown, about 4-5 minutes. Turn the fillets over and continue cooking just until done, 2-3 minutes. Remove from heat and serve over pomegranate couscous. On the serving tray, layer lentils and couscous, then top with salmon. Garnish with additional pomegranate arils and thyme.
This is how we roll
It's almost Thanksgiving, and time to contemplate the turkey and all the trimmings. But wait, shouldn't we be thinking about homemade rolls?
Not just any rolls. Yeast rolls!
On the UC Davis research front, Kyria Boundy-Mills serves as the curator of the Phaff Yeast Culture Collection, one of the world's largest collections of wild yeast. She maintains the collection, distributes strains to academic and industrial researchers around the world, conducts contract screening research for companies and does research on yeast ecology.
One of her current research projects is developing new yeast-based lures for agricultural insect pests.
On the home front, you can also lure your Thanksgiving guests with yeast rolls!
For as long as I can remember, I've been making yeast rolls derived from a family recipe but with my little additions and quirks. Sunset magazine printed my recipe, "Kathy's Yeast Rolls," a number of years ago--alas, no fame, no fortune, no requests for autographs, no Food Network bookings--but I'm told it's become a favorite.
What's good about it: it's delicious, it's quick and easy to make, and it's basically mistake-proof.
Well, there was that ONE mistake.
A friend who had never worked with yeast before told me her rolls didn't rise. "They stayed flat," she said. "They looked nothing like yours."
"Okay, what did you do?" I asked.
"Well, first I boiled the water and then I added the yeast."
"You did w-h-a-a-t? You BOILED the water? Omigosh! You killed the yeast! Homicide in the kitchen! Roll out the yellow caution tape! The water is supposed to be lukewarm, or warm to the wrist."
"Oh," she said. "Whoops!"
So the next time she made it, no more "whoops." The rolls came out perfectly, her husband and children loved them, the sun burst through the clouds, and she's been making them ever since.
In fact, some folks I've shared this recipe with prefer to skip dessert and eat another roll.
Like all dinner rolls, these are best fresh out of the oven. Just add a little melted butter and a dribble of warm honey--preferably starthistle honey--and you won't even think about that turkey and all the trimmings.
This is how we roll!
Kathy's Yeast Rolls1/2 cup of warm water
2 packages of active dry rapid-rise yeast (I use Fleischman's)
1/2 cup of sugar
1/2 cup of light cooking oil (I use Wesson vegetable oil or canola oil)
2 eggs
3/4 cup of scalded milk (let cool to lukewarm)
1/2 teaspoon salt
4 cups of flour
Scald milk. Set aside and let cool to lukewarm. Pour 1/2 cup of warm water (test it so it's warm but comfortable to the wrist) into a standard drinking glass (so you can see how much it rises). Add 1 teaspoon of sugar and two packages of yeast. Stir with wooden spoon. Place in warm place, such as on the kitchen stove, and let rise until the yeast bubbles to the top of the glass.
In a large mixing bowl, mix together the 1/2 cup of sugar and the 1/2 cup of Wesson oil. Add the scalded (now lukewarm) milk and beat lightly with an electric mixer on low, just until mixed. Add the two eggs and the yeast (the yeast has now risen to the top of the glass).
Sift two cups of floor with half a teaspoon of salt and add to the mixture. Beat. Add two more cups of flour, one cup at a time, and mix. Add more flour as needed to make smooth dough, just in between a little sticky and non-sticky. (I usually add one more cup of flour, sometimes a little more, until the texture is smooth. Be careful not to add too much flour; the dough should be on the sticky side.) Knead for a few minutes. In another mixing bowl, added a couple tablespoons of Wesson oil.
Place the rounded ball of dough in the oil and invert. Cover with a light cloth (I use a flour-sack type) and place the bowl on top of your stove or in a warm place to rise until double.
When the dough has risen until double, punch down and form into rolls. Place on a slightly greased cookie sheet. Cover with the flour-sack cloth and place on top of stove. Let the rolls rise until they're "puffy" or about double in size.
Bake at 350 degrees. Check after 10 minutes. Ovens vary. (I usually bake them for 12 to 14 minutes, or until they're a very light golden brown. Do not overbake.)
If you like, top the rolls with melted butter. Recipe makes about 15 rolls, depending on the size. If there's a roll remaining the next day, slip it into a brown-paper bag, close lightly, and heat in microwave oven for about 10 seconds.
Variations
If you want a buttery taste, substitute the half cup of Wesson oil with half a cup of butter.
Cinnamon Rolls
Use basic recipe above, except substitute the 1/2 cup of Wesson oil for 1/2 cup of melted butter. Preheat oven 375 degrees. Roll dough into oblong shape, about 15x9. Spread 2 tablespoons melted butter, or more if desired. Sprinkle 1/2 cup sugar, three teaspoons cinnamon and one teaspoon nutmeg. If desired, add nuts and raisins (about one cup each, or as to taste).
Roll up tightly, starting from the wide side. Seal by pinching edges of roll together. Cut roll into one-inch slices. Place on greased cookie sheet. Cover and let rise until double, about 35 to 40 minutes. Bake 35 to 30 minutes or until golden brown.
French toast
This is excellent for French toast. Slice longways and dip the pieces into your favorite egg/milk mixture. We use the traditional Betty Crocker recipe:
2 eggs
1/2 cup of milk
Bread as needed, sliced longways
Mix eggs and milk in wide bowl. Dip each slice into mixture. Brown each slice on both sides on a hot griddle.
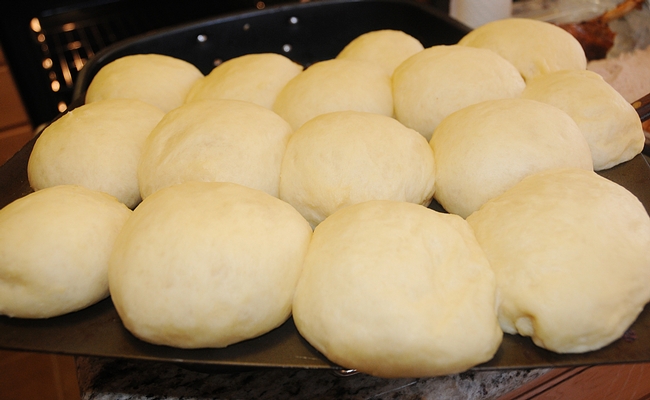
Yeast rolls rising and ready to be popped into the oven. (Photo by Kathy Keatley Garvey)
Time for soup!
She loves to make soup-especially cream of yesterday.—Milton Berle
Suddenly, as I ride my bike to work in the morning, I’m not wearing my capris and sandals, I’m wearing pants, shoes and a jacket—sometimes even gloves! The scarf and ear muffs are not long behind—we have definitely hit fall in northern California!
And fall makes me want to cook comfort food, and what’s more comforting than soup. Not only is soup easy to make, nutritious, delicious, filling and thrifty, you can hide, I mean use, lots of veggies, even some leftovers. Soup is very forgiving. If you add too many ingredients, it just becomes stew!
What’s more elementary than putting a bunch of ingredients in a pot and covering it with some kind of liquid? Nothing, and that’s why soup has been around as long as there was some kind of vessel to make it in. Soup developed regional differences because of what was available where you lived, but it was always a hearty meal and easily digested. Enjoyed across cultures, classes and varying degrees of health, soup remains a classic meal.
Soup is so accessible and inexpensive, it is often used in successful fundraising activities. Across the country “Bowls for Charity” or “Empty Bowl” fundraisers have become popular for, what else, soup kitchens. The concept was initiatied in 1990 when a group of Michigan High School students made ceramic bowls to fill with soup for a food drive. It was so popular, it blossomed into a nationwide fundraiser, focusing on ending hunger. Generally, participants purchase a ticket, choose a handmade bowl, and enjoy a simple meal of soup (often donated by local restaurants), bread and water. The mission of the fundraiser is to remind people that many people have empty bowls, with no food to feed their families. In Yolo County, we have the Empty Bowls luncheon, hosted by the Yolo Wayfarer Center in October; here in Davis we have the annual Souper Bowl in February, hosted by the Davis Co-op, with proceeds going to the Elderly Nutrition Program.
So what’s a good soup to make and share? Well, it could be something thick and hearty like this highly rated Split Pea soup recipe from allrecipes.com:
Split Pea Soup
|

|
In a large stock pot, cover peas with 2 quarts cold water and soak overnight. If you need a faster method, simmer the peas gently for 2 minutes, and then soak for l hour.
Once peas are soaked, add ham bone, onion, salt, pepper and marjoram. Cover, bring to boil and then simmer for 1 1/2 hours, stirring occasionally.
Remove bone; cut off meat, dice and return meat to soup. Add celery, carrots and potatoes. Cook slowly, uncovered for 30 to 40 minutes or until vegetables are tender.
Or something a little more exotic, but still simple, from epicurious.com, like:
Ginger Scallion Egg-Drop Soup
|

|
Smash 3 scallions and cut into 2-inch pieces, then put in a 2-quart saucepan with water, broth, ginger, and 3/4 teaspoon salt. Bring to a simmer, and then poach chicken at a bare simmer, uncovered, until just cooked through, 12 to 15 minutes. Transfer chicken to a cutting board and let broth steep, covered, 10 minutes.
Meanwhile, chop remaining 3 scallions and shred chicken.
Discard scallions and ginger from broth and bring to a brisk simmer. Add beaten eggs in a slow stream, stirring constantly. Remove from heat and stir in scallions, chicken, and white pepper (if using). Serve drizzled with sesame oil.
Or one of my favorite quick and healthy go-to weeknight soups:
Fish Stew
- 1 diced onion
- 3 diced white, red or yellow potatoes
- 2 cups chopped celery
- 3 cups water
- 1 pound diced white fish
- ½ lb. shrimp or scallops (or another ½ lb. white fish)
- 2 cups chopped broccoli
- 2 cups chopped cauliflower
- 1 1/2 teaspoons salt
- 1/2 teaspoon ground black pepper
- 1/2 teaspoon crushed dried marjoram
- 1/2 teaspoon crushed dried basil
- 3 tablespoons all-purpose flour
- 2 cups milk (I use skim, and it’s fine, but it would be richer if you used 2% milk)
In a large, deep skillet, boil onion, celery and potatoes in water for 10 minutes. Add flounder, broccoli, cauliflower, salt, pepper, marjoram and basil.
In a separate bowl, mix flour with milk and slowly add to soup mixture while stirring continuously. Reduce heat and simmer for about 15 minutes. Add shrimp and/or scallops; cook 3-5 minutes more.
