

UC Food Blog
This is how we roll
It's almost Thanksgiving, and time to contemplate the turkey and all the trimmings. But wait, shouldn't we be thinking about homemade rolls?
Not just any rolls. Yeast rolls!
On the UC Davis research front, Kyria Boundy-Mills serves as the curator of the Phaff Yeast Culture Collection, one of the world's largest collections of wild yeast. She maintains the collection, distributes strains to academic and industrial researchers around the world, conducts contract screening research for companies and does research on yeast ecology.
One of her current research projects is developing new yeast-based lures for agricultural insect pests.
On the home front, you can also lure your Thanksgiving guests with yeast rolls!
For as long as I can remember, I've been making yeast rolls derived from a family recipe but with my little additions and quirks. Sunset magazine printed my recipe, "Kathy's Yeast Rolls," a number of years ago--alas, no fame, no fortune, no requests for autographs, no Food Network bookings--but I'm told it's become a favorite.
What's good about it: it's delicious, it's quick and easy to make, and it's basically mistake-proof.
Well, there was that ONE mistake.
A friend who had never worked with yeast before told me her rolls didn't rise. "They stayed flat," she said. "They looked nothing like yours."
"Okay, what did you do?" I asked.
"Well, first I boiled the water and then I added the yeast."
"You did w-h-a-a-t? You BOILED the water? Omigosh! You killed the yeast! Homicide in the kitchen! Roll out the yellow caution tape! The water is supposed to be lukewarm, or warm to the wrist."
"Oh," she said. "Whoops!"
So the next time she made it, no more "whoops." The rolls came out perfectly, her husband and children loved them, the sun burst through the clouds, and she's been making them ever since.
In fact, some folks I've shared this recipe with prefer to skip dessert and eat another roll.
Like all dinner rolls, these are best fresh out of the oven. Just add a little melted butter and a dribble of warm honey--preferably starthistle honey--and you won't even think about that turkey and all the trimmings.
This is how we roll!
Kathy's Yeast Rolls1/2 cup of warm water
2 packages of active dry rapid-rise yeast (I use Fleischman's)
1/2 cup of sugar
1/2 cup of light cooking oil (I use Wesson vegetable oil or canola oil)
2 eggs
3/4 cup of scalded milk (let cool to lukewarm)
1/2 teaspoon salt
4 cups of flour
Scald milk. Set aside and let cool to lukewarm. Pour 1/2 cup of warm water (test it so it's warm but comfortable to the wrist) into a standard drinking glass (so you can see how much it rises). Add 1 teaspoon of sugar and two packages of yeast. Stir with wooden spoon. Place in warm place, such as on the kitchen stove, and let rise until the yeast bubbles to the top of the glass.
In a large mixing bowl, mix together the 1/2 cup of sugar and the 1/2 cup of Wesson oil. Add the scalded (now lukewarm) milk and beat lightly with an electric mixer on low, just until mixed. Add the two eggs and the yeast (the yeast has now risen to the top of the glass).
Sift two cups of floor with half a teaspoon of salt and add to the mixture. Beat. Add two more cups of flour, one cup at a time, and mix. Add more flour as needed to make smooth dough, just in between a little sticky and non-sticky. (I usually add one more cup of flour, sometimes a little more, until the texture is smooth. Be careful not to add too much flour; the dough should be on the sticky side.) Knead for a few minutes. In another mixing bowl, added a couple tablespoons of Wesson oil.
Place the rounded ball of dough in the oil and invert. Cover with a light cloth (I use a flour-sack type) and place the bowl on top of your stove or in a warm place to rise until double.
When the dough has risen until double, punch down and form into rolls. Place on a slightly greased cookie sheet. Cover with the flour-sack cloth and place on top of stove. Let the rolls rise until they're "puffy" or about double in size.
Bake at 350 degrees. Check after 10 minutes. Ovens vary. (I usually bake them for 12 to 14 minutes, or until they're a very light golden brown. Do not overbake.)
If you like, top the rolls with melted butter. Recipe makes about 15 rolls, depending on the size. If there's a roll remaining the next day, slip it into a brown-paper bag, close lightly, and heat in microwave oven for about 10 seconds.
Variations
If you want a buttery taste, substitute the half cup of Wesson oil with half a cup of butter.
Cinnamon Rolls
Use basic recipe above, except substitute the 1/2 cup of Wesson oil for 1/2 cup of melted butter. Preheat oven 375 degrees. Roll dough into oblong shape, about 15x9. Spread 2 tablespoons melted butter, or more if desired. Sprinkle 1/2 cup sugar, three teaspoons cinnamon and one teaspoon nutmeg. If desired, add nuts and raisins (about one cup each, or as to taste).
Roll up tightly, starting from the wide side. Seal by pinching edges of roll together. Cut roll into one-inch slices. Place on greased cookie sheet. Cover and let rise until double, about 35 to 40 minutes. Bake 35 to 30 minutes or until golden brown.
French toast
This is excellent for French toast. Slice longways and dip the pieces into your favorite egg/milk mixture. We use the traditional Betty Crocker recipe:
2 eggs
1/2 cup of milk
Bread as needed, sliced longways
Mix eggs and milk in wide bowl. Dip each slice into mixture. Brown each slice on both sides on a hot griddle.
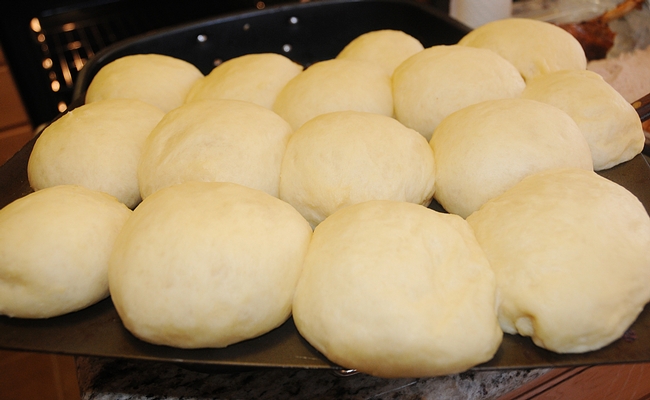
Yeast rolls rising and ready to be popped into the oven. (Photo by Kathy Keatley Garvey)
Time for soup!
She loves to make soup-especially cream of yesterday.—Milton Berle
Suddenly, as I ride my bike to work in the morning, I’m not wearing my capris and sandals, I’m wearing pants, shoes and a jacket—sometimes even gloves! The scarf and ear muffs are not long behind—we have definitely hit fall in northern California!
And fall makes me want to cook comfort food, and what’s more comforting than soup. Not only is soup easy to make, nutritious, delicious, filling and thrifty, you can hide, I mean use, lots of veggies, even some leftovers. Soup is very forgiving. If you add too many ingredients, it just becomes stew!
What’s more elementary than putting a bunch of ingredients in a pot and covering it with some kind of liquid? Nothing, and that’s why soup has been around as long as there was some kind of vessel to make it in. Soup developed regional differences because of what was available where you lived, but it was always a hearty meal and easily digested. Enjoyed across cultures, classes and varying degrees of health, soup remains a classic meal.
Soup is so accessible and inexpensive, it is often used in successful fundraising activities. Across the country “Bowls for Charity” or “Empty Bowl” fundraisers have become popular for, what else, soup kitchens. The concept was initiatied in 1990 when a group of Michigan High School students made ceramic bowls to fill with soup for a food drive. It was so popular, it blossomed into a nationwide fundraiser, focusing on ending hunger. Generally, participants purchase a ticket, choose a handmade bowl, and enjoy a simple meal of soup (often donated by local restaurants), bread and water. The mission of the fundraiser is to remind people that many people have empty bowls, with no food to feed their families. In Yolo County, we have the Empty Bowls luncheon, hosted by the Yolo Wayfarer Center in October; here in Davis we have the annual Souper Bowl in February, hosted by the Davis Co-op, with proceeds going to the Elderly Nutrition Program.
So what’s a good soup to make and share? Well, it could be something thick and hearty like this highly rated Split Pea soup recipe from allrecipes.com:
Split Pea Soup
|

|
In a large stock pot, cover peas with 2 quarts cold water and soak overnight. If you need a faster method, simmer the peas gently for 2 minutes, and then soak for l hour.
Once peas are soaked, add ham bone, onion, salt, pepper and marjoram. Cover, bring to boil and then simmer for 1 1/2 hours, stirring occasionally.
Remove bone; cut off meat, dice and return meat to soup. Add celery, carrots and potatoes. Cook slowly, uncovered for 30 to 40 minutes or until vegetables are tender.
Or something a little more exotic, but still simple, from epicurious.com, like:
Ginger Scallion Egg-Drop Soup
|

|
Smash 3 scallions and cut into 2-inch pieces, then put in a 2-quart saucepan with water, broth, ginger, and 3/4 teaspoon salt. Bring to a simmer, and then poach chicken at a bare simmer, uncovered, until just cooked through, 12 to 15 minutes. Transfer chicken to a cutting board and let broth steep, covered, 10 minutes.
Meanwhile, chop remaining 3 scallions and shred chicken.
Discard scallions and ginger from broth and bring to a brisk simmer. Add beaten eggs in a slow stream, stirring constantly. Remove from heat and stir in scallions, chicken, and white pepper (if using). Serve drizzled with sesame oil.
Or one of my favorite quick and healthy go-to weeknight soups:
Fish Stew
- 1 diced onion
- 3 diced white, red or yellow potatoes
- 2 cups chopped celery
- 3 cups water
- 1 pound diced white fish
- ½ lb. shrimp or scallops (or another ½ lb. white fish)
- 2 cups chopped broccoli
- 2 cups chopped cauliflower
- 1 1/2 teaspoons salt
- 1/2 teaspoon ground black pepper
- 1/2 teaspoon crushed dried marjoram
- 1/2 teaspoon crushed dried basil
- 3 tablespoons all-purpose flour
- 2 cups milk (I use skim, and it’s fine, but it would be richer if you used 2% milk)
In a large, deep skillet, boil onion, celery and potatoes in water for 10 minutes. Add flounder, broccoli, cauliflower, salt, pepper, marjoram and basil.
In a separate bowl, mix flour with milk and slowly add to soup mixture while stirring continuously. Reduce heat and simmer for about 15 minutes. Add shrimp and/or scallops; cook 3-5 minutes more.
UC student farms seed innovation

In 1971, student enthusiasm for a garden at UC Santa Cruz that used natural cultivation methods grew so much so that 14 acres were set aside for the UC Santa Cruz Farm and Garden to create more opportunities to research and teach organic farming. Meanwhile, a student-led seminar at UC Davis on alternative agriculture mushroomed into a group that lobbied campus administration for land to create a farm that would explore sustainable agriculture. With support from the College of Agricultural and Environmental Science, the UC Davis Student Farm formed in 1977 on 20 acres of what was then a remote corner of campus.
In the decades that followed, these student-led movements helped spur the growth of organic farming and formed the foundations for innovative sustainable agriculture research and education programs at UC Davis and UC Santa Cruz that have served as models for other universities.
Read more and view slideshow at UC Newsroom
Peek inside a UC Master Food Preserver kitchen
I brought my camera with me to a Master Food Preservers class Saturday at UC Cooperative Extension Sacramento County on pressure canning. In case you’ve been thinking about participating in a Master Food Preservers class, here’s a peek inside the Sacramento demonstration kitchen:

“Cooking is a whole different ball game from canning — a whole different science,” Prendergast said. He's been a UC Master Food Preserver since 1995, and regularly teaches the monthly Saturday morning classes in Sacramento county. Next month's Saturday morning class will be on dehydrating, 10 a.m. to 12 p.m., Dec. 10.


UC Master Food Preservers is a volunteer organization structured in a way similar to UC Master Gardeners. Master Food Preserver candidates complete training to become knowledgeable in food preservation and then are required to volunteer time sharing their knowledge with the public by teaching classes and answering questions.
UC Cooperative Extension currently has Master Food Preservers in four counties:
- Sacramento
- El Dorado (now known as Central Sierra)
- Los Angeles
- San Bernardino
In Sacramento County, the Master Food Preservers offer a monthly class on Saturday mornings that focuses on techniques of a specific preservation process – either water-bath canning, pressure canning or dehydrating. Once a month on Wednesday evenings, the group offers classes that focus on preserving specific fruits or vegetables.
This Wednesday’s class is on “Fall Fruits and Winter Squash” which will include quince and pomegranates among others. The class is 6:30 – 8:30 p.m. at the UC Cooperative Extension office, 4145 Branch Center Road in Sacramento; registration to attend is $3.
Time for a new citrus variety in your backyard?
To me, one of the best things about fall and winter in California is that these seasons herald the beginning of citrus season. Each November, I anxiously await the arrival of the Satsuma Mandarins at the farmer's market, and during their short but delicious season we indulge in a 10-pound bag of the little gems every week.
We have three kinds of citrus growing in our backyard, (sadly no Satsumas), and I secretly enjoy calling family back in Colorado when I know it's snowing to report that we are enjoying juice squeezed from oranges picked from our tree that morning.
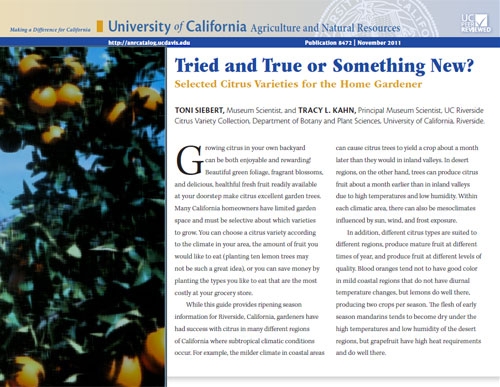
If you enjoy growing your own citrus (even without the guilty pleasure of tormenting your relatives) you'll want to check out the new UCANR publication Tried and True or Something New? Selected Citrus Varieties for the Home Gardener. This free, downloadable publication gives side-by-side comparisons of old backyard favorites to newly developed varieties suitable for home growers.
The guide includes ripening information for Riverside, but gardeners in subtropical climate zones statewide can enjoy success with most of these varieties.
From blood oranges to citrons, kumquats to 'Kaffir' limes, there's something different here for every gardener. Hmmmm, I think I need to find a place in our yard for a "Tahoe Gold!"
TriedandTrue
